How to add video backgrounds on Skype and Microsoft Teams

A step-by-step guide to using video backgrounds in your Skype and Teams calls

...
Chris
Share:

Using a video for your virtual background is a great way to make your background more realistic (or more fun!).

Follow the steps below to use a video as your custom background in Microsoft Teams and Skype.

This method should also work for video backgrounds on Webex, Zoom, Google Meet and other platforms. However, if you’re using Zoom or Google Meet, there’s a much faster way to add a video background: read our how-to guides for Zoom backgrounds here or Google Meet backgrounds here.

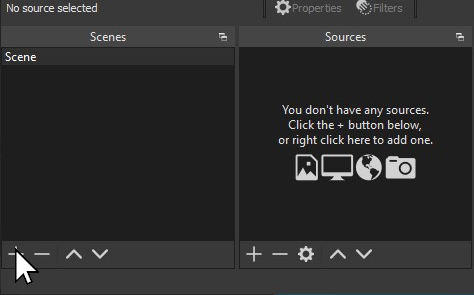
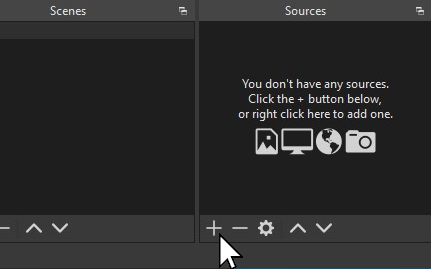
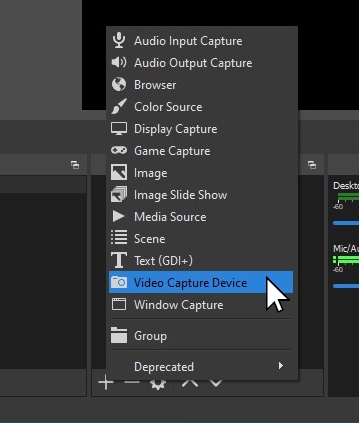
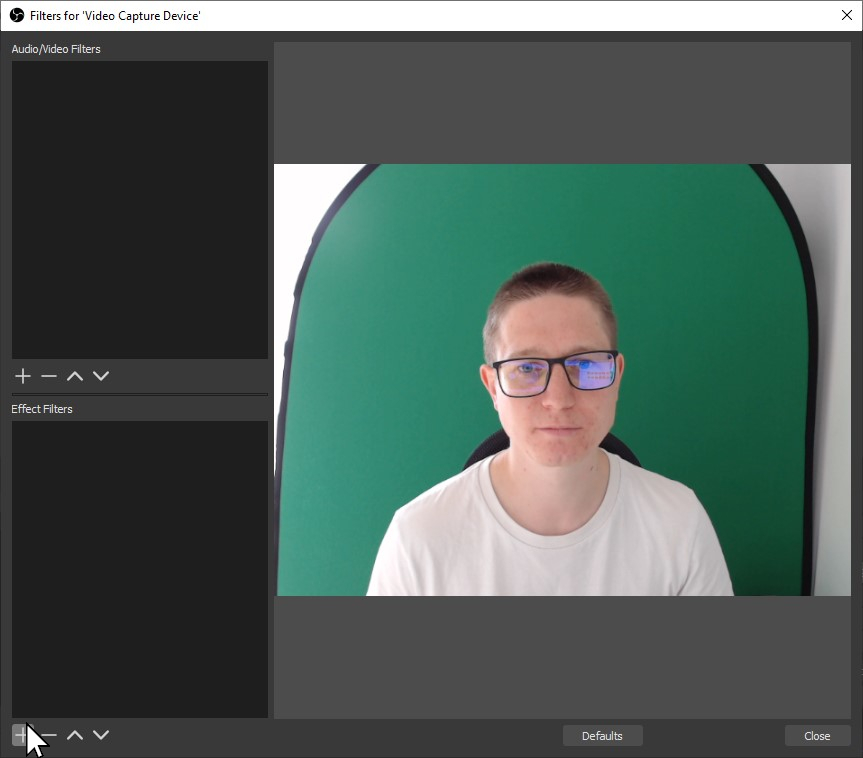
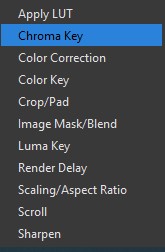
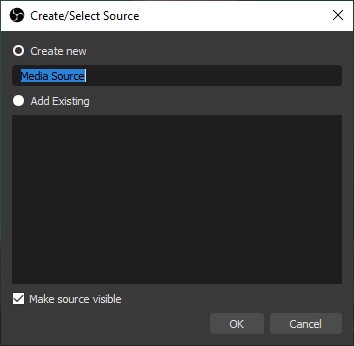
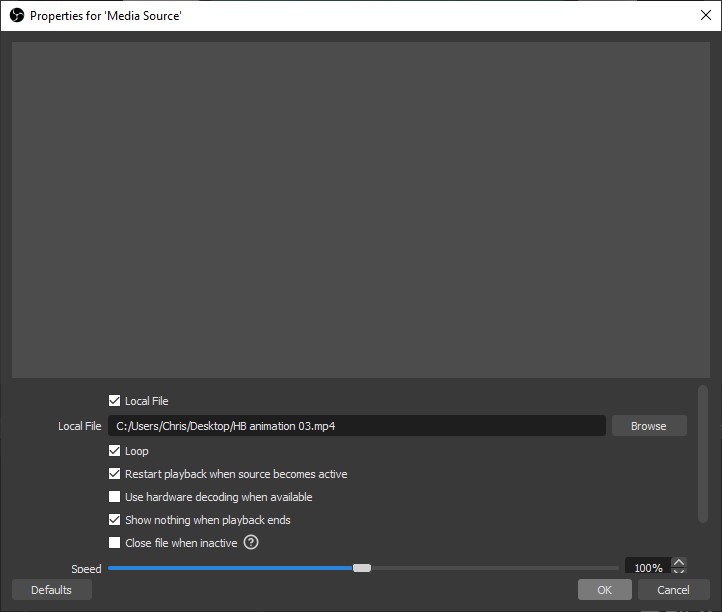
How to add a video background on Skype, Teams or Webex:

  1. First, save your desired video background on your computer or device.
    If you want some new video backgrounds, browse and download our beautiful selection here

If you have a green screen

If you do not have a green screen, please skip to the next section to use an alternative program.

  1. Set up your green screen.
    Tip: You can create a makeshift green screen by sticking green material on the wall behind you or follow these tips to make your own green screen.
  2. Download Open Broadcaster Software (OBS) onto your computer (for free). It’s an open source video recording tool for Windows, Mac and Linux (see system requirements here).
  3. In OBS, go to ‘Scenes’
  4. Click + to add a new scene
    Click + to add a new scene
    Click + to add a new scene
  5. Select (click) the scene you’ve created
  6. Click + under ‘Sources’ to add a new source
    Click + to add a new source
    Click + to add a new source
  7. Select ‘Video Capture Device’
    Select 'Video Capture Device'
    Select 'Video Capture Device'
  8. Select ‘Create new’
  9. Under ‘Device’ select your device (i.e. your computer webcam / camera you want to use) and click OK (unless you wish to change any other settings first).
  10. Right-click the source you’ve created and select ‘Filters’
    Select 'Filters'
    Select 'Filters'
  11. Under ‘Effect Filters’, click +
    Click +
    Click +
  12. **Select ‘Chroma Key’
    Select 'Chroma Key
    Select 'Chroma Key
  13. Ensure ‘green’ is selected under ‘Key Color Type’ and click ‘close’.

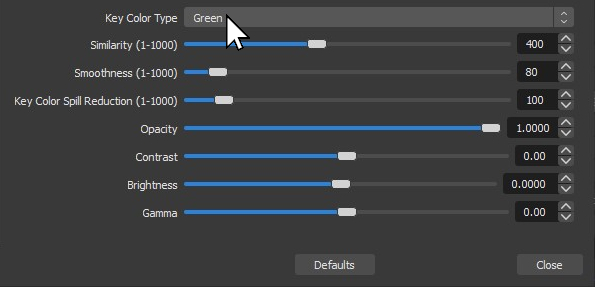
*NB: If you later find your green screen is not being filtered properly, you can choose a custom colour here to correct it (i.e. to ensure it’s picking out the right shade of green to remove)

Ensure 'green' is selected

  1. In the ‘Sources’ section, click + to add a new source
  2. Select ‘Media Source’
    Select 'Media Source'
    Select 'Media Source'
  3. Click OK
    Click OK
    Click OK
  4. The Properties window will appear. Click ‘browse’ to select your video background from your device.
    Click browse
    Click browse
  5. Ensure ‘Loop’ is ticked and press OK
  6. If the background image is too large for the view, you can resize it by dragging the corners
    Resize background
    Resize background
  7. Right-click the background, select ‘Order’ then select ‘Move to Bottom’
    Move to bottom
    Move to bottom
  8. Click ‘Start virtual camera’. This should be in the bottom right of your OBS window.
    Start virtual camera
    Start virtual camera
  9. If your green screen doesn’t fill the field of view of the webcam, you can use the ‘Crop / Pan’ filter to crop out anything you don’t want to be visible.
  10. You should now see yourself appear with your lovely custom video background!
    Video background success
    Video background success
  11. Now skip to the final section below.

If you do not have a green screen

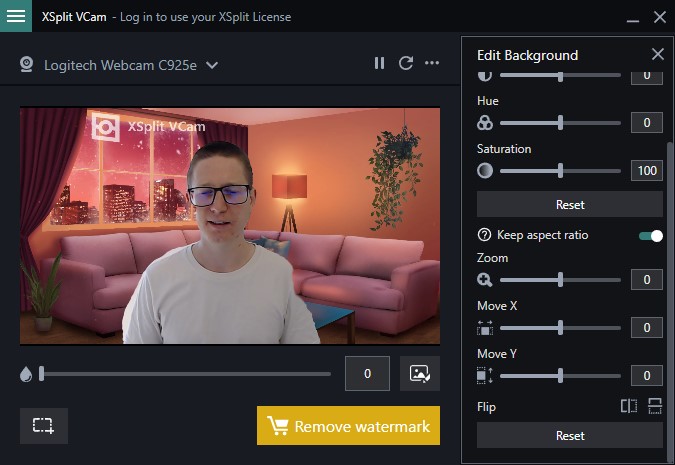
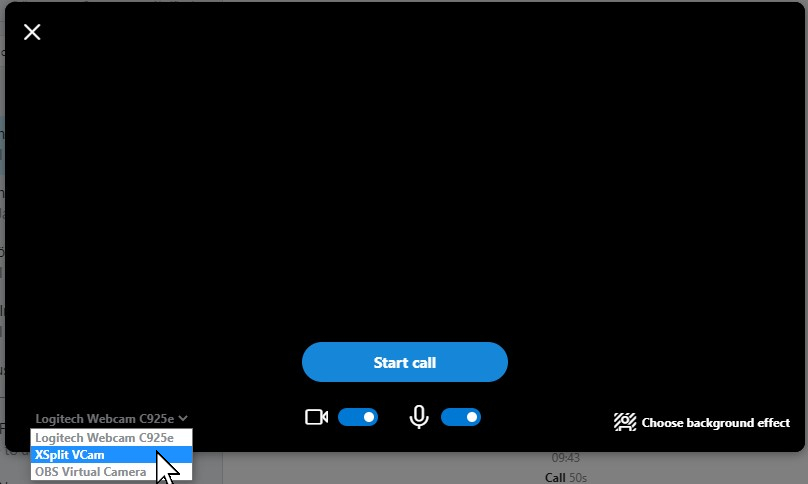
If you don’t have a green screen, you can use a program called XSplit VCam to remove and replace your background.

  1. Download XSplit VCam here. This is a webcam background removal software. Please note, the free version will produce a watermark on your video. The paid version will be watermark-free.
  2. Open XSplit VCam and select ‘Add background’
    Add background
    Add background
  3. Select ‘media file’
  4. Choose the video background from your device
  5. Your background will automatically be replaced by your video
    Background replaced
    Background replaced

Once you’ve set up OBS or XSplit VCam:

  1. Open Microsoft Teams, Skype or Webex (or your other preferred video call platform)
  2. If using Microsoft Teams, go to Device Settings

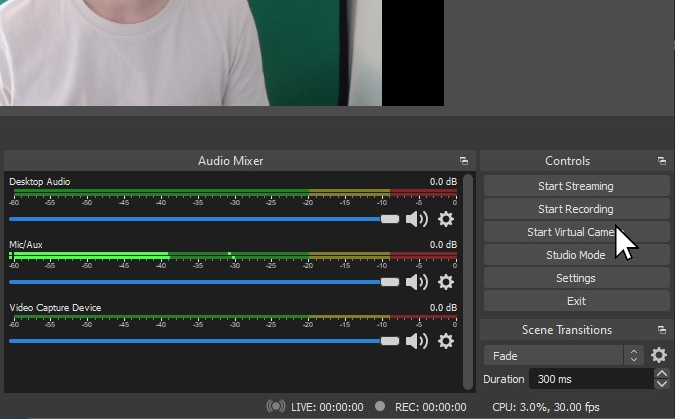
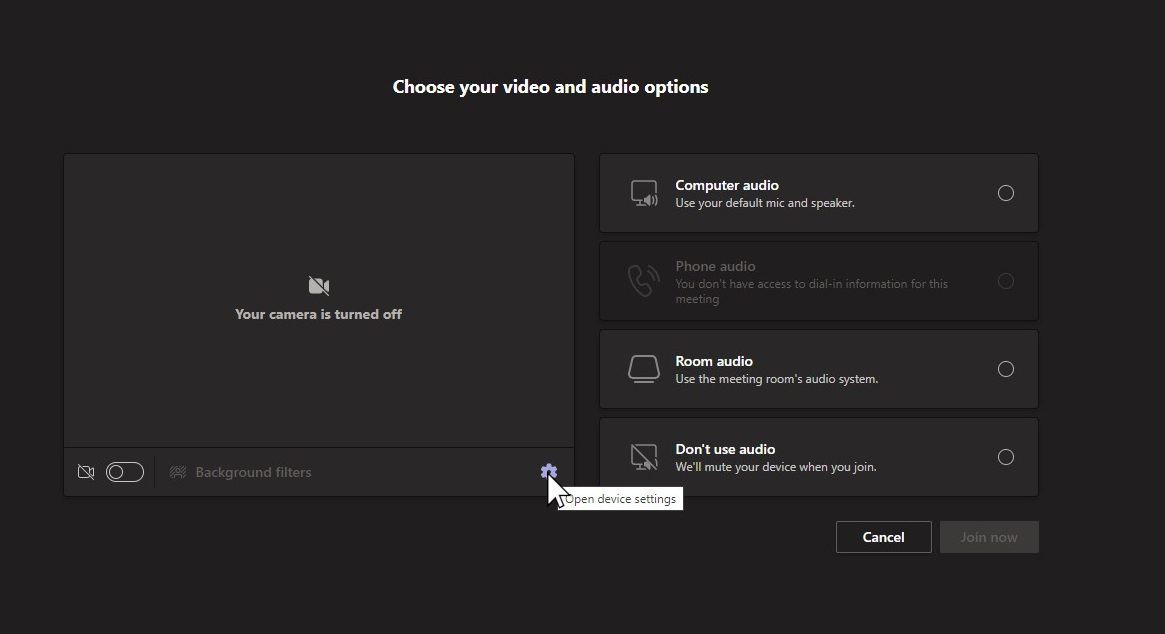
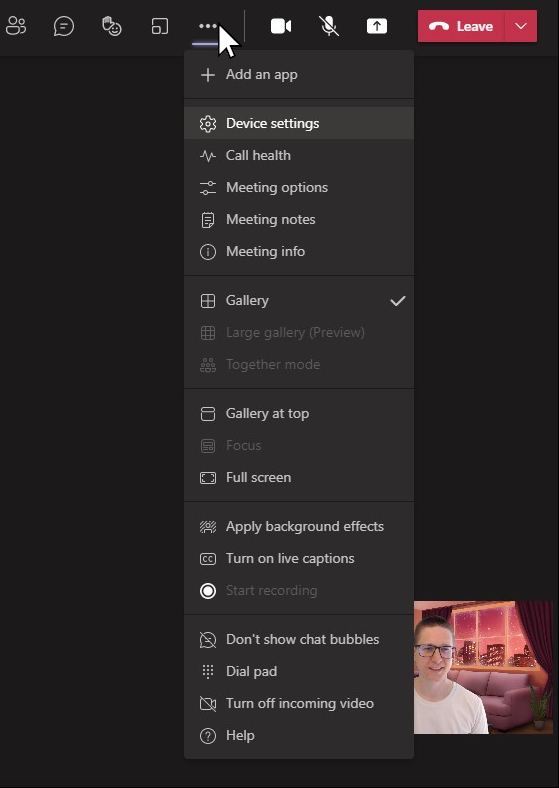
If you are doing this before joining the call, select the cog symbol

Device settings
Device settings

If you are doing this during a call, ‘Device Setting’ can be found under the ““ (3 vertical dots).
Device settings
Device settings

  1. Under ‘Camera’, select ‘OBS-Camera’ or ‘XSplit VCam’ depending on whether you’d used OBS or XSplit VCam used
    Choose camera
    Choose camera

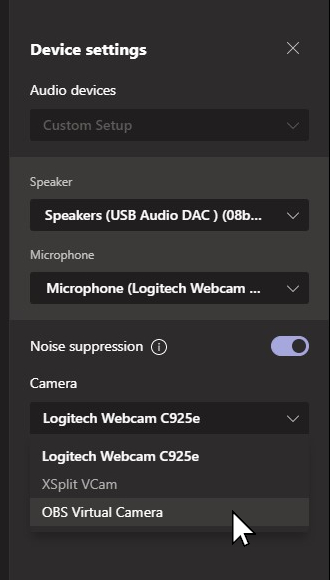
NB: Ensure ‘No background’ is selected in the Background settings within Microsoft Teams

  1. You and your virtual video background should now appear!
    Video background success
    Video background success
  2. If you are using Skype, select the video source and choose ‘OBS-Camera’ or ‘XSplit VCam’ depending on which one you are using.
    Select device
    Select device

Please note:
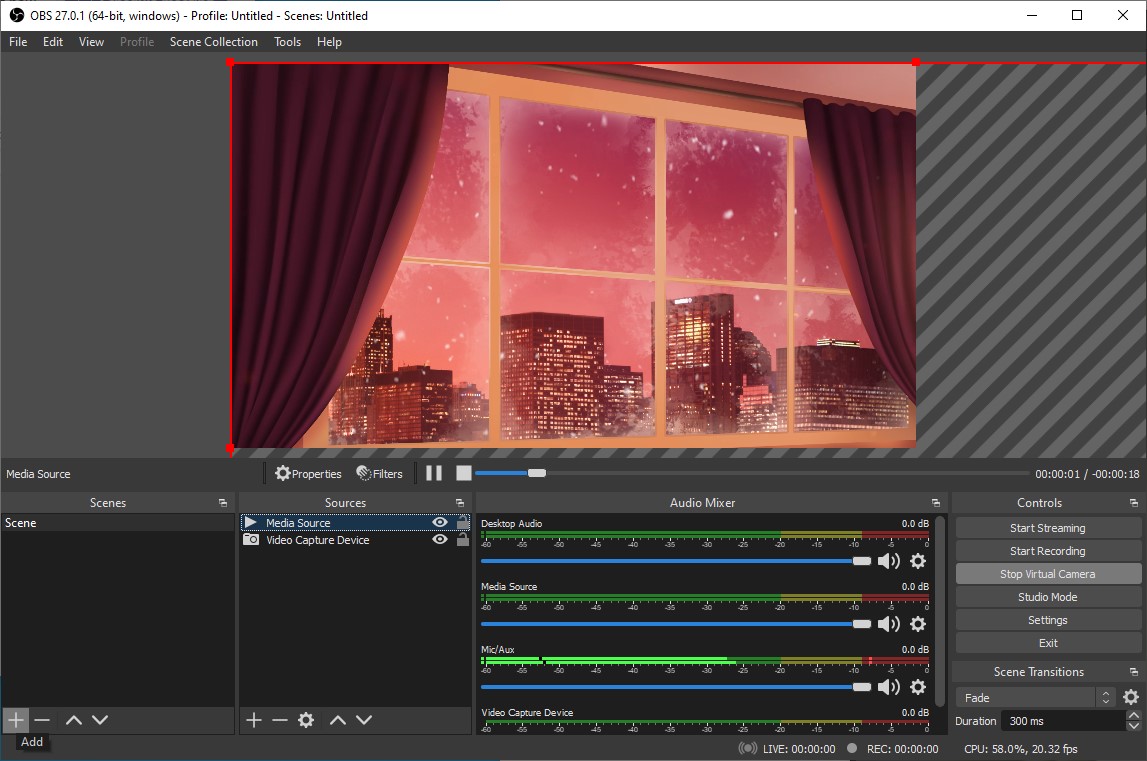
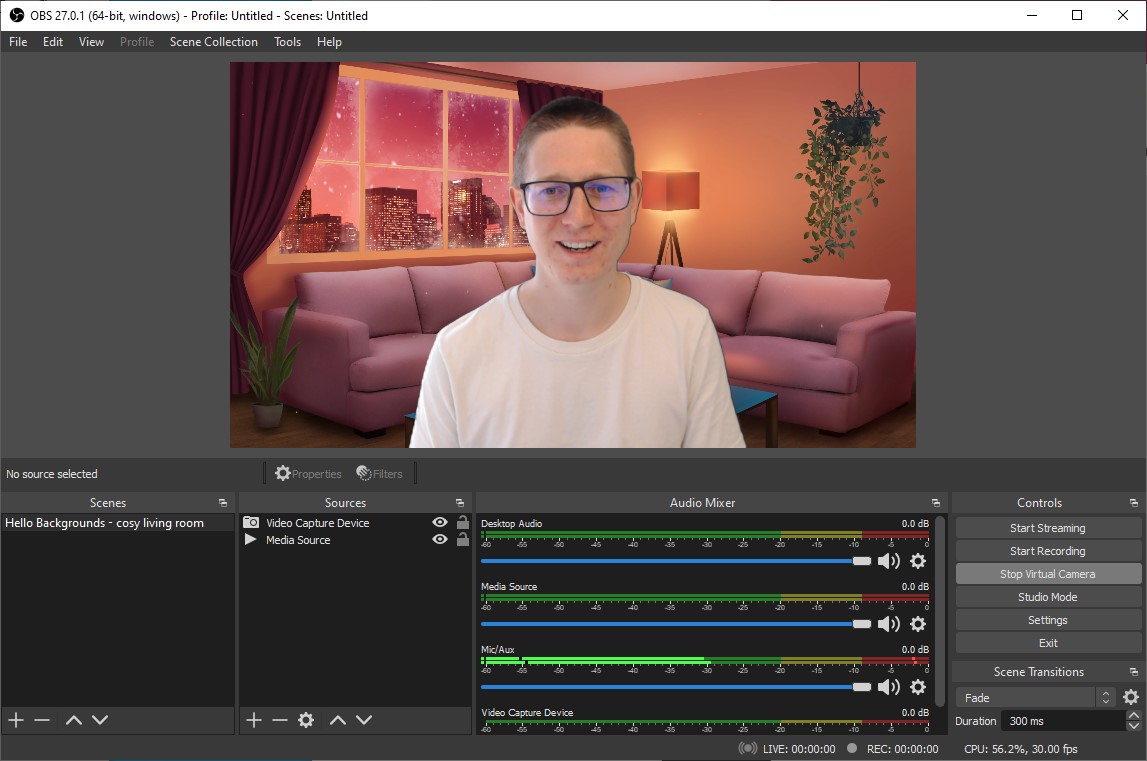
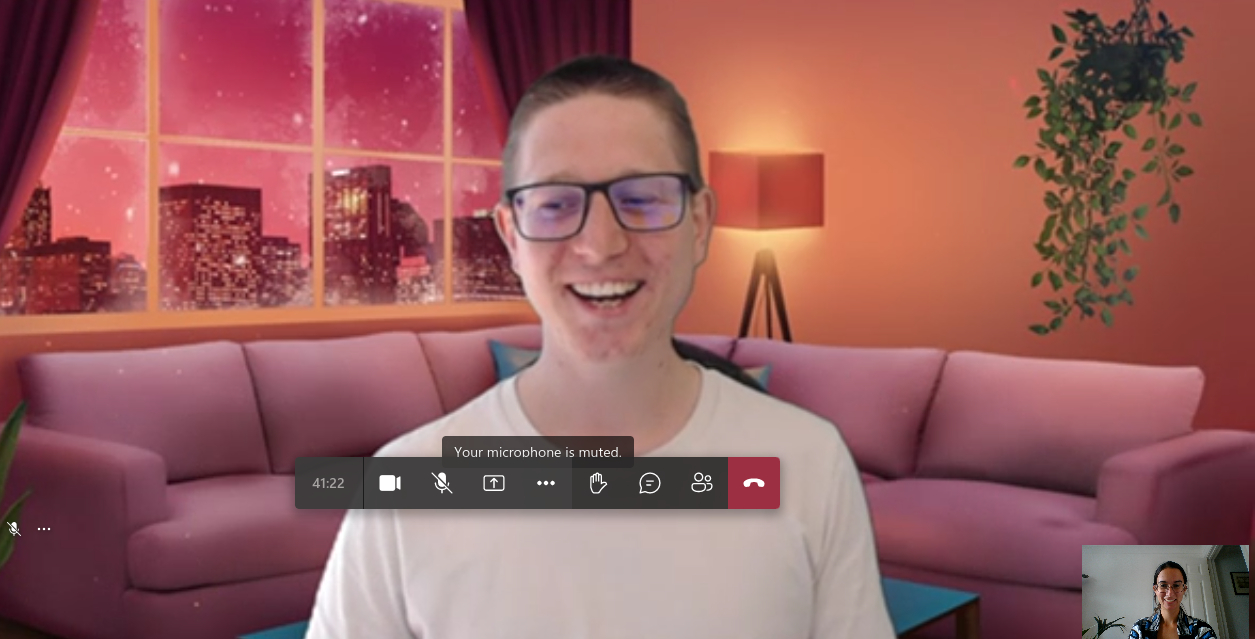
Don’t worry if you appear blurry or as a mirror image when you preview your video; it will look correct to others on your call!
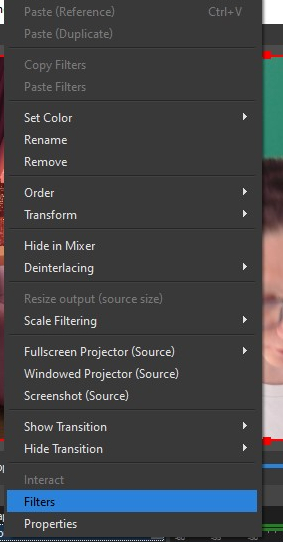
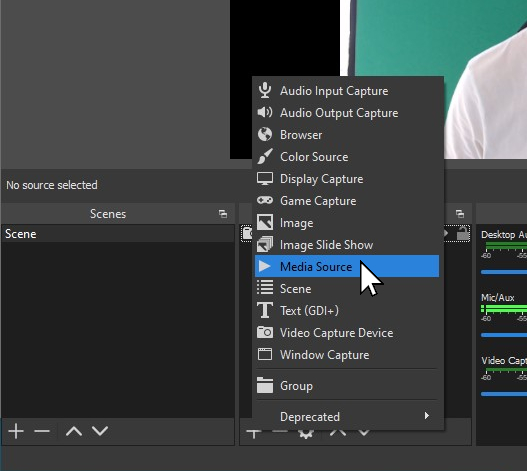
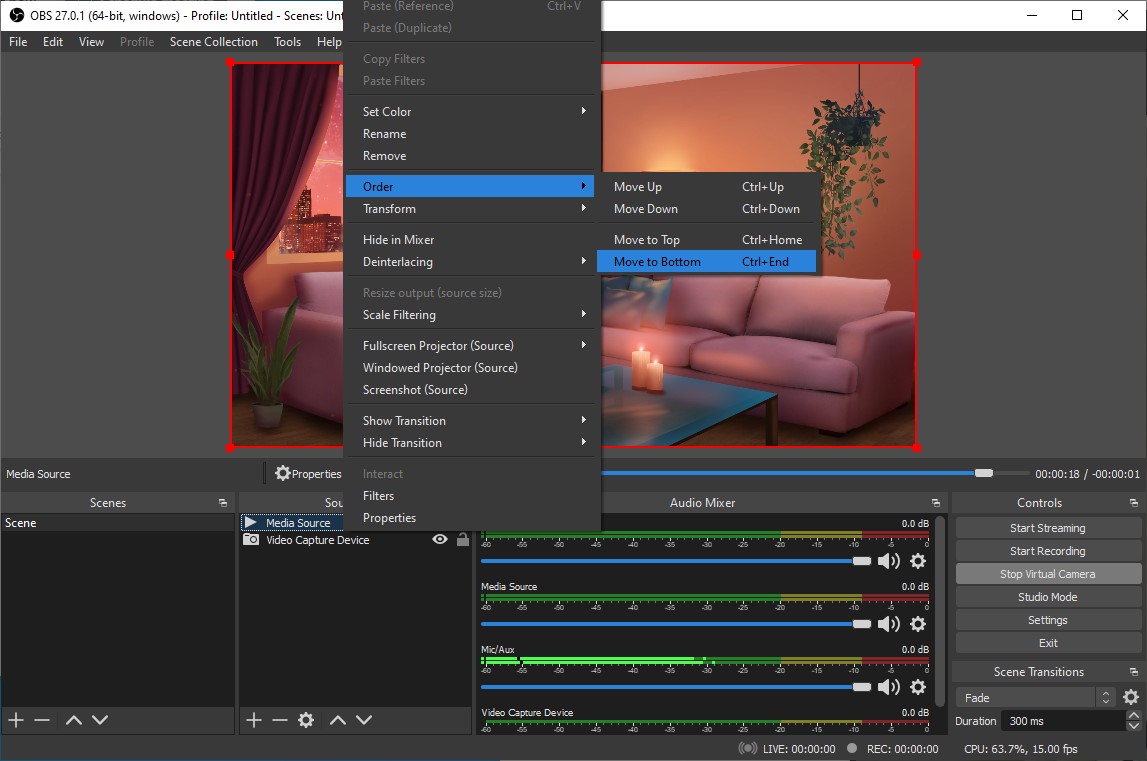
To change your video background during a meeting or class, add or select a new scene in OBS using the previous instructions, or upload a new media file to XSplit VCam. The change should be reflected in your Teams, Skype or Webex call automatically.

Find new backgrounds

Bring your calls to life with our custom video backgrounds. Stay professional or sprinkle some fun into your meetings and classes with a beautiful range of 100+ high-quality video and animated backgrounds. Download now.

Read more guides

...
Chris
Share:

Make the right impression

Look great on Zoom, Teams and Skype Meetings